- Press Nest’s display to wake it up.
- Scroll to “Settings” and select.
- Choose “Technical Info”, then “Power”.
- You’ll see “Battery” listed with a voltage. If it’s under 3.6V, it’s likely charging. Above 3.6V, it’s properly charged. If the battery isn’t charging or is dead, troubleshooting is needed.
Welcome to the world of smart, energy-efficient living with the Nest Thermostat! A pioneering innovation in the realm of home automation, the Nest Thermostat has made temperature regulation a breeze, offering unparalleled comfort, convenience, and cost-effectiveness. However, as with all tech devices, maintaining its battery health is crucial to ensuring its optimal performance.
In this blog post, we aim to take you on an informative journey on how to check the battery of your Nest Thermostat. From understanding the signs of a battery that needs attention to a step-by-step guide on how to check its status, this post is your go-to guide for maintaining your Nest Thermostat’s battery health. So, join us as we explore the nuances of this smart gadget’s energy source and learn how to keep your Nest Thermostat performing at its best.
After familiarizing ourselves with the importance of Nest Thermostat’s battery maintenance in the introduction, let’s dive deeper into understanding this smart device. The following sections will provide a brief overview of the Nest Thermostat and its remarkable features, emphasizing its battery life and energy-efficient design.
Brief Overview of Nest Thermostat and its Features
Before we move forward, it’s crucial to know what we are dealing with. The Nest Thermostat isn’t just a thermostat. It’s a smart home device that integrates seamlessly with your existing home infrastructure and offers benefits beyond temperature control.
A. Description of Nest Thermostat
Nest Thermostat is a programmable, self-learning, sensor-driven, Wi-Fi-enabled thermostat that optimizes heating and cooling of homes and businesses to conserve energy. Introduced by Google’s subsidiary, Nest Labs, this smart device is equipped with a rechargeable lithium-ion battery that typically lasts between 1-2 years, depending on usage and environment.
B. Discuss Key Features and Benefits
Here are some standout features and benefits of the Nest Thermostat:
- Energy Savings: Nest Thermostats can save up to 10-12% on heating bills and 15% on cooling bills, according to Nest Labs.
- Self-Learning Capabilities: Nest Thermostats learn from your behaviors, preferences, and surroundings to create a custom heating and cooling schedule, which further enhances energy savings.
- Wi-Fi Connectivity and Smart Home Integration: The device can be controlled via smartphone, tablet, or smart home assistants like Google Home and Amazon Alexa.
- Safety Alerts: Nest Thermostats can detect unusual or dangerous temperature fluctuations and send alerts to connected devices.
C. Energy-Efficient Design and Battery Life
Nest Thermostat is lauded for its energy-efficient design. It uses built-in sensors and the location of your phone to understand if you’re home or away, so it can adjust the temperature accordingly and save energy.
Moreover, its battery life is impressive. The device operates on a built-in, rechargeable lithium-ion battery, which is designed to last for years, thus reducing the need for frequent replacements. However, the exact battery life depends on your usage, Wi-Fi connectivity strength, and number of connected devices.
Having understood the Nest Thermostat’s key attributes and unique features, we can better appreciate the importance of maintaining its battery health. In the following section, we’ll delve into understanding the battery of your Nest Thermostat in greater depth. So, keep reading to unlock your device’s full potential.
Armed with a thorough understanding of the Nest Thermostat’s unique features, let’s delve deeper into one of its core components: the battery. A sound grasp of this aspect can go a long way in ensuring efficient thermostat operation.
Understanding the Battery of Your Nest Thermostat
A sound comprehension of the Nest Thermostat’s battery setup can significantly enhance your ability to maintain it effectively. Let’s look at the battery type used in a Nest Thermostat, how it operates, and the typical longevity.
A. The Type of Battery Used in a Nest Thermostat
The heart of a Nest Thermostat’s power supply is a built-in, rechargeable lithium-ion battery. Unlike some other thermostats, which rely on replaceable AA or AAA batteries, Nest opted for a long-lasting, rechargeable solution to power its devices. This feature enhances the eco-friendly and cost-effective nature of the product.
B. How the Battery Works
The Nest Thermostat’s lithium-ion battery works in harmony with a feature known as the C-Wire, or “Common Wire.” This wire provides a steady power supply from your home’s HVAC system to keep the thermostat and its Wi-Fi connectivity running without draining the battery too quickly.
When the thermostat is connected to Wi-Fi and actively used, it consumes more power. If there isn’t a C-Wire installed, the Nest Thermostat can utilize a technology called “power stealing,” where it draws small amounts of power from other wires. However, this method may not provide the most consistent power supply and can sometimes lead to power-related issues.
C. The Lifespan of the Battery
Typically, the Nest Thermostat’s built-in, rechargeable lithium-ion battery is designed to last for many years without the need for replacement. However, the exact lifespan of the battery can vary based on numerous factors, including the strength of your Wi-Fi connection, the number of connected devices, and the overall usage of the thermostat.
In most cases, the battery can last between 1-2 years, depending on the thermostat’s usage and conditions. However, it is essential to note that the battery does not need replacement like regular batteries, as it recharges itself using your home’s HVAC system power.
In the following section, we’ll explore the signs that indicate your Nest Thermostat battery needs attention and how to address potential issues. Keep reading to ensure your Nest Thermostat continues to provide you with optimal performance.
As we delve further into the intricate workings of the Nest Thermostat’s battery, it’s vital to recognize the signs that your battery may need attention. Understanding these signs can help prevent potential issues and maintain your thermostat’s functionality.
Signs Your Nest Thermostat Battery Needs Attention
It’s not always obvious when a device’s battery starts to dwindle, but there are telltale signs that you can watch out for to ensure your Nest Thermostat remains in optimal condition.
A. Signs of a Low or Failing Battery
Here are some common symptoms indicating that your Nest Thermostat’s battery may be running low:
- Frequent Restarting: If your Nest Thermostat frequently restarts on its own, it could be a sign that the battery is running low.
- Connectivity Issues: You might experience trouble connecting your thermostat to Wi-Fi or other devices in your home.
- The Device is Unresponsive: If the thermostat doesn’t respond to your inputs, the screen remains dark, or settings can’t be adjusted, these may be signs of a low or failing battery.
- Low Battery Warning: The Nest Thermostat provides a clear low battery warning on its display, stating that the battery is low and needs to recharge.
B. Potential Issues if the Battery is Ignored
Ignoring the warning signs of a low battery can lead to several problems:
- Inconsistent Temperature: Your home’s temperature may fluctuate as the thermostat may not function correctly.
- Loss of Settings: You could lose all your custom settings, schedules, and preferences as the device might reset to default settings.
- Complete Shut Down: In worst-case scenarios, ignoring a low battery warning could result in a complete shutdown of your thermostat.
C. Importance of Regular Battery Checks
Regularly checking your Nest Thermostat’s battery is crucial to prevent these issues. A routine check-up can help you identify potential problems before they escalate, saving you time and ensuring a comfortable, uninterrupted experience with your thermostat.
Having a good understanding of these signs and potential issues is crucial in the care of your Nest Thermostat. Up next, we’ll guide you through a step-by-step process of how to check the battery on your Nest Thermostat. Keep reading to empower yourself with practical know-how for maintaining your thermostat.
Having a solid grasp on the signs that may indicate battery issues, it’s time to look at how you can actively check your Nest Thermostat’s battery status. Follow this step-by-step guide to learn how to do so.
Step-by-step Guide to Checking Battery on Nest Thermostat
Checking the battery level on your Nest Thermostat is quite straightforward. Here’s a simple guide to help you navigate through the process:
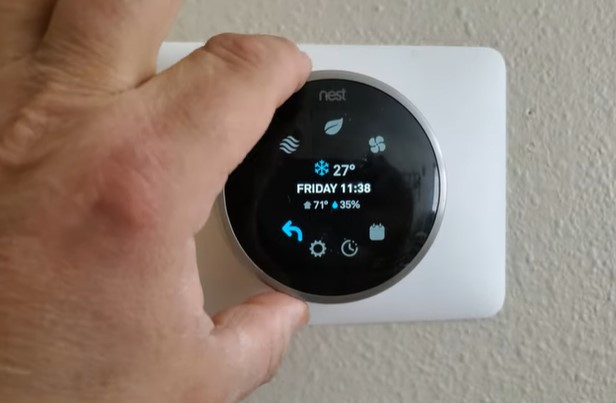
A. Step 1: Accessing the Thermostat Menu
Press the thermostat ring to bring up the menu. Here, you will see a range of different icons.
B. Step 2: Navigating to the Energy Settings
Rotate the ring to the right until you reach the ‘Settings’ icon, which looks like a gear. Press on the ring to select it. Once you’re in the settings menu, rotate the ring to navigate to the ‘Technical info’ option, then select ‘Power.
C. Step 3: Understanding the Battery Status Indications
In the ‘Power’ menu, you’ll see a ‘Battery’ section, which displays the voltage of your battery. A voltage of 3.6V or higher indicates a fully charged battery. If the voltage is significantly lower, your battery might be running low.
Keep in mind that the voltage can fluctuate, especially when the system is active, but it should not drop too far below 3.6V. If it does, you may experience some of the battery-related issues discussed earlier.
With this step-by-step guide, you should be able to effectively monitor the health of your Nest Thermostat’s battery. In the next section, we will look at how to troubleshoot battery issues should they arise. Stick with us to equip yourself with the tools necessary to keep your thermostat functioning flawlessly.
In the event that your Nest Thermostat’s battery is low or encounters issues, knowing how to troubleshoot can be immensely beneficial. In this section, we’ll provide actionable tips to help you navigate any battery-related challenges that may come up.
VI. Troubleshooting Battery Issues
Troubleshooting battery issues with your Nest Thermostat can save you time and maintain an optimal environment in your home or office. Here’s what you can do if the battery is low, needs recharging or replacement, or if the battery indicator shows a problem.
A. What to Do if the Battery is Low
If your Nest Thermostat battery is low, there are a couple of steps you can take:
- Check the C-Wire: If your system doesn’t have a C-Wire, it might be power stealing to charge itself. While this usually works without issues, it might be inconsistent in some cases. In such situations, installing a C-Wire might help provide a consistent charge to the thermostat.
- Reset the Thermostat: If the low power issue persists, resetting the thermostat might help. You can do this by selecting ‘Reset’ from the settings menu and then choosing ‘Restart.’ However, remember that a reset might revert any saved settings.
B. How to Replace or Recharge the Battery
Unlike traditional thermostats, Nest Thermostats feature a built-in, rechargeable lithium-ion battery, so you won’t need to replace the battery in the traditional sense. Instead, the thermostat draws power from your HVAC system to recharge its battery.
However, if your Nest Thermostat isn’t charging or the battery is draining too quickly, it could be due to power-related issues. In such cases, you might want to seek assistance from a professional technician or contact Nest Support.
C. What to Do if the Battery Indicator Shows a Problem
If the battery indicator on your Nest Thermostat shows a problem, the first step is to check if the device is correctly connected to the HVAC system. Sometimes, loose wires or a blown fuse can lead to power issues.
If everything seems fine with the connections, and the issue persists, it’s advisable to reach out to Nest Support. They can guide you through more specific troubleshooting steps, or you might need to arrange for a professional inspection of your system.
Being aware of how to troubleshoot your Nest Thermostat’s battery issues can help keep your device in optimal condition. Next, we will look at some tips for maintaining your Nest Thermostat battery, so be sure to continue reading to ensure your thermostat keeps ticking for a long time to come.
Now that we’ve covered how to troubleshoot battery issues, let’s focus on preventive care. A few simple tips can significantly extend your Nest Thermostat’s battery life and overall longevity.
VII. Tips for Maintaining Your Nest Thermostat Battery
Proper maintenance of your Nest Thermostat can help optimize its battery life and ensure a smooth, efficient operation for years to come.
A. Ways to Extend Battery Life
- Minimize Screen Wake-ups: The more frequently the thermostat’s screen is activated, the more battery it uses. Try to limit unnecessary interactions with the thermostat screen.
- Optimal Placement: Ensure your Nest Thermostat is installed in a location that is not subject to extreme temperature variations, as this can affect battery life.
- Maintain Strong Wi-Fi Connection: A weak Wi-Fi connection can cause the thermostat to work harder to stay connected, thus draining the battery faster. Make sure your thermostat is within range of a strong Wi-Fi signal.
B. Proper Thermostat Care and Maintenance
- Regular Checks: Perform regular battery checks as outlined in this guide to ensure your battery is in good health.
- Keep it Clean: Dust can affect the thermostat’s operation. Use a soft, dry cloth to gently clean the device.
- Regular Software Updates: Ensure your Nest Thermostat’s software is up-to-date. Software updates often include patches for known issues that might affect the thermostat’s battery life.
- Professional Maintenance: If you notice any significant issues with your thermostat’s operation or battery life, it’s wise to contact a professional or Nest Support for assistance.
By adhering to these tips, you can help ensure the longevity and performance of your Nest Thermostat’s battery.
In closing, it’s clear that while the Nest Thermostat is a highly efficient and intelligent device, proper care and regular checks are necessary to maintain its effectiveness. By taking these steps, you can ensure a comfortably regulated home environment while also making the most of this smart device’s energy-saving capabilities. Happy regulating!
In this final section, we will address some of the most frequently asked questions about the Nest Thermostat’s battery. The goal is to provide answers to common queries and solutions to prevalent issues.
VIII. Frequently Asked Questions (FAQs) about Nest Thermostat Battery
Here are answers to some common questions about the Nest Thermostat battery and its functionality, as well as solutions to typical problems:
A. Common Questions About the Battery and Its Functionality
- Q: How long does the battery last in a Nest Thermostat?A: The built-in lithium-ion battery in a Nest Thermostat is designed to last for many years without the need for replacement. However, the exact lifespan can depend on several factors, including Wi-Fi strength, the number of connected devices, and overall usage.
- Q: Can the battery be replaced in a Nest Thermostat?A: Unlike traditional thermostats, the Nest Thermostat has a built-in rechargeable lithium-ion battery that is designed to last for the lifespan of the thermostat, so it does not need to be replaced.
- Q: What does a low battery warning on a Nest Thermostat mean?A: A low battery warning indicates that the thermostat’s battery voltage has dropped below a certain level. It could be due to several reasons, including power issues with the home’s HVAC system or issues with the Wi-Fi connectivity.
B. Solutions to Common Problems
- Q: My Nest Thermostat’s screen is black and unresponsive, what should I do?
- A: This could indicate a low or depleted battery. Try charging your thermostat by connecting it to a micro-USB cable for about 10-15 minutes. If the screen remains unresponsive, you may need to reset your thermostat or contact Nest Support.
- Q: My Nest Thermostat is frequently disconnecting from Wi-Fi, could it be a battery issue?
- A: While a low battery could cause connectivity issues, it’s also important to check the strength of your Wi-Fi signal. If the signal is weak or unstable, it can cause the thermostat to disconnect frequently. You might need to move your router closer to the thermostat or use a Wi-Fi extender.
By addressing these common questions and concerns, we hope to have provided you with a comprehensive guide to your Nest Thermostat’s battery. Regular maintenance and understanding your device’s functionality are key to ensuring the longevity and efficiency of your Nest Thermostat. Should you encounter any problems, remember that Nest Support is always available to assist you.
Conclusion
Navigating through the intricacies of your Nest Thermostat’s battery may seem daunting at first, but with the insights provided in this guide, you should be well equipped to maintain, check, and troubleshoot your device effectively.
A well-maintained Nest Thermostat not only guarantees a consistently comfortable environment in your home but also contributes to energy efficiency. From understanding your thermostat’s features to knowing how to check the battery status and troubleshoot potential issues, every piece of knowledge helps ensure a seamless experience.
Remember, regular checks and preventive care can significantly prolong the lifespan of your Nest Thermostat’s battery and the device as a whole. By doing so, you’re ensuring the optimal performance of this intelligent home gadget, making the most of its innovative features and benefits.
We hope you’ve found this guide useful and enlightening. Should you have any further queries or encounter any difficulties, Nest Support is always at your disposal. Happy thermostat managing!
Related Post: